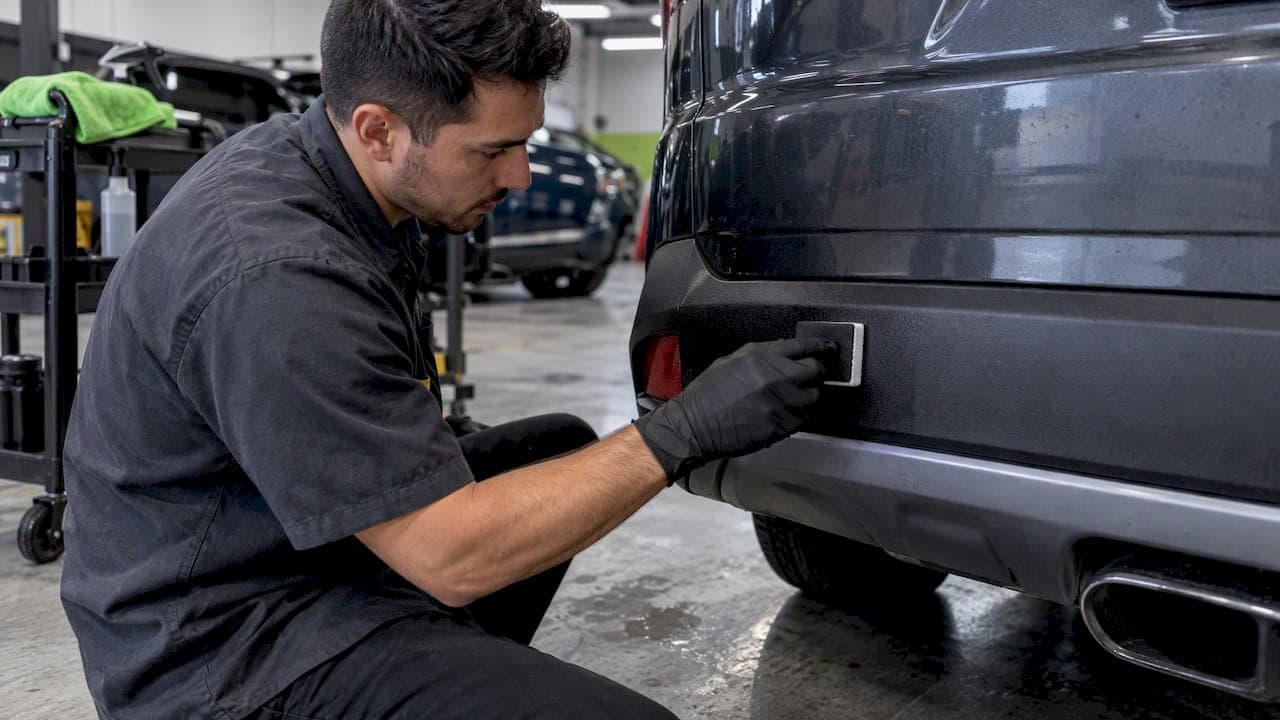
Yes, you can ceramic coat exterior plastic trim, but not with the same product you put on your paint. Textured black trim needs a coating made for it, a clean and fully stripped surface, and a patient application. Get those three things right and the trim stays dark and even for years rather than weeks. Get them wrong and you end up with streaks in the texture that are harder to remove than the fade you started with.
This guide covers which trim a coating suits, how to prepare it, what goes wrong, and when it makes more sense to book a shop than to do it in your driveway.
TL;DR
- Use a coating made for textured exterior trim. Standard hard paint coatings are designed for rigid surfaces and can look glossy or crack on flexible plastic.
- Prep decides the result. Old silicone or wax dressings block the bond, so strip them with isopropyl alcohol or a panel wipe first.
- Test a hidden spot, work the product into the texture and buff right away. High spots on trim cure into stubborn residue.
- A coating protects and darkens trim, but it cannot repair cracked or chalky, structurally damaged plastic.
- If you want the trim done with the paint, wheels and film in one visit, a controlled indoor shop saves you the guesswork.
Table of Contents
- What a trim coating actually does
- Which plastic you can coat, and which you should leave alone
- Why paint coatings and trim coatings are not interchangeable
- Step by step: how trim coating is done properly
- Common questions about trim products
- Where trim coating fits in a full protection plan
- Our perspective: why trim is the part people regret skipping
- DIY or professional: how to decide
- Keeping coated trim looking right
- Protecting the whole car in Van Nuys
- FAQ
- Sources
What a trim coating actually does
Most people meet trim care through dressings: the oily spray that makes bumpers look wet for a week. A dressing sits on top of the plastic and washes off with the first heavy rain or a few trips through the car wash.
A trim-specific ceramic coating is a different product. It cures into a layer that bonds to the surface instead of sitting on it. One widely sold trim coating is guaranteed by its maker to last at least 200 washes, which is a useful yardstick: that is the difference between a layer you reapply monthly and one you think about once a year or less. That figure is a manufacturer claim for one product, so treat it as a benchmark, not a promise for every coating or every car.
The benefits you can reasonably expect from a properly applied trim coating:
- A deeper, more even black on faded unpainted trim.
- Easier washing, because dirt and road film have less to grip.
- A barrier against UV, the main cause of the grey, chalky look.
- A finish that stays dry to the touch rather than greasy.
What it will not do is rebuild plastic. Research on UV damage to polymers shows that degradation starts at the surface and works deeper over time. That is why timing matters. Coat trim while it is merely faded and the coating slows further damage. Wait until it is cracking or crumbling and the coating can only mask the problem.
Which plastic you can coat, and which you should leave alone
Not every piece of plastic on a car is a candidate. Detailers advise assessing the material type and condition before coating any plastic, because a product that works well on textured exterior trim can be wrong for smooth, interior or transparent plastics.
| Surface | Good candidate? | Notes |
|---|---|---|
| Unpainted black bumper trim and lower valances | Yes | The classic use case. Fades to grey with sun exposure. |
| Fender flares and wheel arch trim | Yes | Heavy textured surfaces that collect road film. |
| Windshield cowl and wiper cowl plastic | Yes | Constant sun and water exposure. |
| Mirror housings and door handle surrounds (unpainted) | Usually | Test first. Smooth finishes can streak. |
| Painted plastic bumpers | Treat as paint | Use the same coating as the rest of the paint. |
| Interior trim and screens | No | Different materials and different finishes. Leave to interior products. |
| Headlight lenses and clear plastics | No | Transparent plastics react differently. |
| Cracked, chalking or brittle trim | Not yet | Replace or repair first. A coating hides damage, it does not fix it. |
Newer cars deserve extra caution. Many current vehicles use low-gloss OEM trim that already looks good. Coating it can darken it unevenly, which is why the test spot below is not optional.
Why paint coatings and trim coatings are not interchangeable
This is the mistake we see people make most: they have a bottle of the coating they used on the paint and use the leftovers on the trim.
Hard paint coatings are formulated for rigid clear coat. On flexible, porous, textured plastic they can crack, or leave an unnaturally glossy finish. Trim-specific formulas are built to bond into the pores of the plastic and give a satin, low-gloss look closer to how the part left the factory.

There is a visual reason too. Shiny paint and shiny trim side by side look wrong. Factory trim is meant to read as a quiet, dark contrast. A trim coating keeps that character; a glossy paint coating on a bumper insert makes it look wet and cheap.
Step by step: how trim coating is done properly
Whether you do it yourself or watch a professional do it, this is the sequence that works.
- Wash and decontaminate. Clean the trim with an all-purpose cleaner and a soft brush so dirt comes out of the texture, not just off the top. Rinse and dry fully.
- Strip old dressings. This is the step that makes or breaks the job. Silicone and wax-based dressings leave an oily film that stops the coating bonding to the plastic, and the coating then fails early. Wipe the trim with high-percentage isopropyl alcohol or a dedicated panel wipe until the cloth comes away clean.
- Mask nearby paint and glass. Trim coatings stain paint edges and are a pain to remove from adjacent surfaces. Tape the borders.
- Test a hidden spot. Pick an inconspicuous area and check for unintended darkening, streaking or an uneven finish, particularly on newer, low-gloss factory plastics.
- Apply in small sections. Work one panel or a section of a panel at a time. A little product goes a long way.
- Work it into the texture. Use a soft brush or applicator to push the product into recessed grain, then level it.
- Buff immediately. Wipe with a clean microfiber before the product flashes. Practitioners stress thorough, prompt buffing because improper leveling leaves visible streaks in recessed areas.
- Let it cure. Follow the maker's cure time for your product and keep the trim dry and away from dressings during that window.
Fixing high spots
High spots are patches where excess product cured unevenly. On trim they look like dark, glassy smears. Catch them early. Our write-up on fixing ceramic coating high spots by cure stage explains why the timing of your fix matters more than how hard you scrub, and the same principle applies on trim: the sooner you spot it, the gentler the fix.
Common questions about trim products
Can you just paint plastic trim instead?
You can, but paint on flexible unpainted trim tends to chip and peel at edges and changes the look of the part for good. Coating keeps the original texture. If the trim is beyond saving, painting or replacing is reasonable; for faded but sound trim, a coating is the lower-risk route.
Does a home remedy restore faded plastic?
Oily household products can darken trim briefly, but they are essentially dressings. They wash off, attract dust and, if they contain silicone, will interfere with a proper coating later. If you plan to coat, avoid them.
What about trim next to film or wraps?
Film and coatings can live together. Specialized ceramic overlays designed for film bond to solvent-resistant polyurethane PPF and add UV resistance and easier cleaning. We cover the wait times in our guide to ceramic coating over PPF.
Where trim coating fits in a full protection plan
Trim is one part of a car that ages. Paint, glass and trim each fail differently, so each gets a different defense:
- Paint: film on the high-impact zones for rock chips, coating over everything for chemical resistance and easy washing. Industry professionals describe the two as complementary rather than competing, especially on higher-value vehicles.
- Trim: a trim-specific coating to keep the black black.
- Glass: window tint to cut heat and UV reaching you and the interior. Our piece on indoor tinting and UV protection explains the details.
- Wheels and calipers: heat and brake dust call for their own coatings.
If you are protecting a new car, the order matters. Film and paint work come first, then coatings, then trim, so nothing is dressed or sealed before it should be. Doing the whole car in one planned sequence also avoids the situation where a trim product contaminates a panel that was about to be coated.
Our perspective: why trim is the part people regret skipping
We protect vehicles in a climate-controlled, dust-free facility, and trim is where our setup shows its value. Anyone who has coated textured plastic outdoors knows the problem: pollen, dust and wind get into the product while it flashes, and the grain traps everything. Working indoors takes most of that variable away.
Our view, built on the cars we see in the San Fernando Valley, is simple. Valley sun is relentless, and unpainted trim is usually the first thing to go grey. Owners notice it long before they notice anything on the paint, and by then they have often tried two or three dressings that now have to be stripped. If you are weighing options, we would rather you protect the trim while it is still dark than pay to hide it once it has faded.

We also see EVs regularly, and Tesla owners in particular. Those cars have a lot of satin black and body-colored plastic around sensors and cameras, which is a reason to have the work done by someone who knows where products can and cannot go. If you drive one, our guides to Tesla paint protection and protecting Tesla's soft paint show how we think about the whole car.
And a plain rule we give everyone: coat sound trim, replace damaged trim, and never trust a coating to fix plastic that has already broken down.
— Jake
DIY or professional: how to decide
A small trim kit is a reasonable weekend project if you have a single car, a garage and a lot of patience. The risks are the ones above: skipped prep, streaks in the grain and product staining nearby paint. Be honest about which of these you can control.
DIY makes sense when:
- The trim is only lightly faded, not chalky or cracked.
- You can work in shade or a garage with no wind.
- You have time to strip old dressings completely.
- You are happy to test and redo a small area.
A shop makes sense when:
- You are already booking paint protection film, ceramic coating or tint and want everything done together.
- The car has a lot of textured trim, flares or a truck-style cowl.
- You want a coating warranty on the work instead of relying on your own application.
- The car is new and you do not want to risk uneven darkening on low-gloss factory plastic.
We are a service shop, and we do not sell self-install kits. If you want help judging whether your trim is worth coating or past it, that is a conversation we are glad to have.
Keeping coated trim looking right
After the cure period, maintenance is light:
- Wash with a pH-neutral soap and a soft brush so dirt does not settle in the grain.
- Avoid greasy tire shines and dressings on or near coated trim. They can leave residue on the surface and defeat the point.
- Rinse brush-driven cleaners thoroughly.
- Re-inspect once or twice a year. If water no longer beads or the color looks flat, it may be time to refresh.
If your car also has a ceramic coating on the paint, our ceramic coating maintenance guide covers the washing routine that keeps warranties valid. Matte or satin finishes need extra care too; our article on ceramic coating for matte paint explains how to avoid permanent sheen, which is the same worry people have with satin trim.
Protecting the whole car in Van Nuys
If you would rather not spend a weekend with a brush and a bottle of alcohol, we can handle the protective work at our Van Nuys shop. Our ceramic coating options come in 1-year, 5-year and lifetime tiers, and we can pair them with paint protection film on the areas that take rock chips. Everything is installed in a climate-controlled facility, with manufacturer-backed warranties.
Prices depend on the vehicle and the package, so we do not list them online. Get in touch through our site and tell us the make, model and what you want protected. If you are curious what film costs in general, read our PPF cost guide.
FAQ
Can I use my regular ceramic coating on plastic trim?
Usually not. Standard hard paint coatings are made for rigid surfaces and can crack or look unnaturally glossy on flexible plastic. A trim-specific formula gives a satin finish closer to the factory look.
How long does a trim ceramic coating last?
It depends on the product, the prep and how the car is washed and parked. One well-known trim coating is guaranteed by its manufacturer for at least 200 washes, which gives a rough sense of what quality products aim for. Dressings, by comparison, usually wash off quickly.
Will a coating fix cracked or chalky plastic?
No. Once the plastic is cracking or structurally degraded, a coating can only mask the damage. UV damage works from the surface downward, so the best time to coat is while the trim is only faded.
What happens if I coat over a silicone dressing?
The oily layer blocks the bond between coating and plastic, and the coating tends to fail early. Strip the trim with high-percentage isopropyl alcohol or a panel wipe first, and wipe until the cloth comes away clean.
Sources
- Ceramic Coating for Exterior Plastic Trim, NANOLAB
- Trim Ceramic Coating, Glidecoat
- Trim Coat, Cerakote
- Ceramic Coating vs Paint Protection Film, Kovalent Coatings
- Probing photodegradation beneath the surface: UV-degraded polymeric coatings