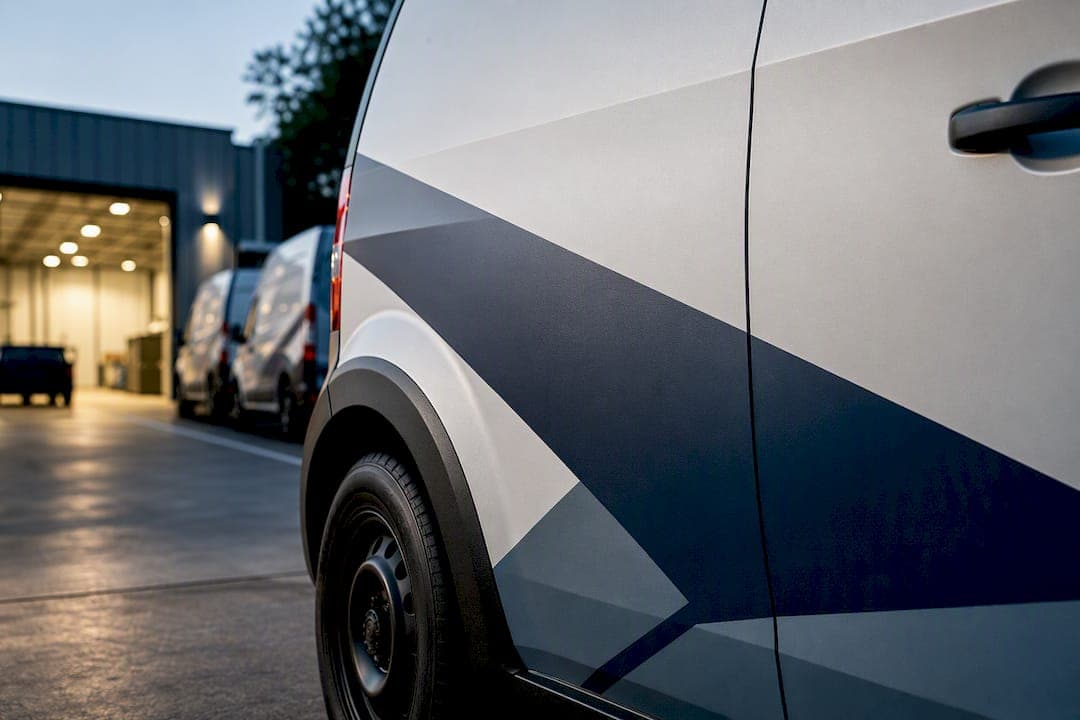
Treat every vehicle in your fleet as a moving billboard: build one visual hierarchy (logo first, one service line, one contact method) and lock it into a central style guide before a single wrap goes on a panel. Legibility at highway speed and asset consistency across vendors matter more than clever design. Get the hierarchy and the style guide right, and the design rules, materials, and rollout steps below turn that decision into an actual program.
TL;DR:
- Proper hierarchy and central style guides are essential for ensuring legibility at highway speeds and consistency across multiple vendors.
- Long-lasting vinyl wraps use cast vinyl with UV lamination, with reflective film necessary for low-light conditions and PPF for paint protection.
- Designing for speed involves emphasizing the logo, a short service descriptor, and a primary contact in high-contrast, appropriately sized, and unobstructed zones.
- A fleet style guide should include exact color specifications, vehicle templates, and installation standards to prevent rework and ensure uniform results.
- Conducting pilot installations and phased rollouts minimizes risks, allowing resolution of issues like color mismatches and fit problems before full deployment.
Table of Contents
- What Do Fleet Graphics and Fleet Branding Actually Cover?
- Why Does Fleet Branding Matter, and How Do You Measure It?
- Materials and Applications: What Should You Actually Spec?
- What Design Rules Keep Your Fleet Legible at Speed?
- How Do You Build a Fleet Style Guide and Vehicle Library?
- How Should You Sequence Production and Installation?
- What Does Fleet Branding Actually Cost, and How Do You Track ROI?
- What Compliance and Safety Markings Does Your Fleet Need?
- How Do You Maintain and Extend the Life of Fleet Graphics?
- How Do You Sequence a Low-Risk Fleet Branding Rollout?
- An Installer's Take on What Actually Goes Wrong
- Get Your Fleet Wrapped Right the First Time
- Where to Go for Deeper Specs and Compliance Guidance
- Sources
What Do Fleet Graphics and Fleet Branding Actually Cover?
Fleet graphics are the vinyl wraps, decals, or lettering applied to company vehicles that turn them into rolling advertisements, extending brand visibility every mile they drive. Fleet branding is the bigger umbrella: the standards, approvals, and consistency rules that make sure those graphics look identical whether they're on a delivery van in one city or a service truck three states away.
Choosing the right application depends on the vehicle's job and how long you plan to keep it branded:
- Full wrap: best for high-visibility vehicles (delivery vans, service trucks) that need maximum brand presence and color-change flexibility.
- Partial wrap: covers key panels (hood, sides, rear) when budget or lease terms limit full coverage.
- Cut vinyl lettering and logos: cheapest option, ideal for sedans or short-term leased vehicles where a full wrap doesn't make financial sense.
- Paint protection film (PPF): not a branding material on its own, but relevant when a wrapped or painted vehicle also needs scratch and chip protection underneath or around graphics.
Leased vehicles usually call for removable cut vinyl or partial wraps to avoid lease-return penalties, while owned vehicles can justify full wraps with longer expected service lives.
Why Does Fleet Branding Matter, and How Do You Measure It?
A driver, pedestrian, or fellow motorist typically has a 3 to 5 second window to register what your vehicle says before it's out of view. That window is why fleet branding lives or dies on hierarchy, not decoration. If someone can't read your phone number in that window, the wrap isn't doing its job, no matter how good it looks parked in a lot.
Statistic Callout: Design guidance built around that 3 to 5 second window recommends a strict information order: logo, a short service descriptor, then the primary contact method. Cramming in five services and two phone numbers defeats the purpose.
The business case for fleet branding rests on treating each vehicle like a marketing channel with trackable inputs:
- Assign a dedicated phone number to fleet vehicles so calls can be attributed to vehicle-driven awareness.
- Build a short landing page URL or QR code specific to the fleet program.
- Use UTM parameters on that landing page to separate fleet traffic from other channels in analytics.
- Layer in call tracking so sales or dispatch teams can log where a lead first saw the vehicle.
Give the program sufficient time before judging ROI. Vehicle-driven leads tend to arrive as slow, cumulative brand recall rather than a single traceable spike, so short evaluation windows will underrate what the wraps are actually doing.
Materials and Applications: What Should You Actually Spec?
Material choice is where budget and lifespan collide, and getting it wrong either wastes money on overbuilt graphics or forces an early rewrap. Cast vinyl with a UV-protective laminate is the standard for any fleet vehicle expected to stay on the road more than a couple of years. Calendered vinyl is thinner, cheaper, and fine for short-term promotions or flat panels, but it shrinks and cracks faster under sun and heat.
Here's how the main material categories break down by use case:
- Cast vinyl + laminate: the default for long-life fleet wraps; conforms well to curves and holds up under repeated washing.
- Calendered vinyl: acceptable for flat surfaces, short campaigns, or vehicles you plan to rotate out within a year or two.
- Reflective film: required or strongly recommended for vehicles operating in low-light conditions, construction zones, or roadside service work, since it improves both safety and nighttime brand visibility.
- PPF: distinct from wrap material entirely. PPF protects paint from rock chips and abrasion; it doesn't carry branding on its own but is sometimes layered under or around graphics on high-value vehicles to keep the paint pristine long-term.
If your fleet includes vehicles that idle roadside frequently (tow trucks, utility vans, delivery fleets working early or late hours), reflective striping isn't optional dressing. It's a safety layer that happens to double as brand presence in headlights.
What Design Rules Keep Your Fleet Legible at Speed?
Design for a fleet wrap isn't the same problem as designing a poster or a website banner. Nobody studies a moving van the way they study a menu. Every design decision has to survive being glanced at from a moving car.
Follow this order when laying out any panel:
- Lead with the logo. It should be the largest, highest-contrast element on the vehicle, positioned where the eye naturally lands first (typically the rear panel and both sides).
- Add one service descriptor. A single short line ("Emergency Plumbing," "24/7 Towing") beats a bulleted list of everything you offer. Nobody reads a list at 45 miles per hour.
- Close with one primary contact. Pick either a phone number or a URL, not both competing for attention, and make it large enough to read from two lanes over.
Keep logos and phone numbers above a minimum readable size for your vehicle class. As a working rule, phone numbers should be tall enough to be legible from a typical viewing distance on the road. Use high-contrast color pairings (dark text on light backgrounds or vice versa) rather than relying on brand colors that happen to be low contrast against each other. Horizontal, typography-based logos in bold sans-serif faces read better across curved panels than tall or script-heavy marks.
Every vehicle body has safe zones (flat, unobstructed panels) and danger zones (door handles, gas caps, wheel wells, mirrors) where text and logos get cut, distorted, or blocked. Map both zones before artwork goes to print, not after.
Pro Tip: Skip the literal speed motifs, the swooshes and motion lines, unless your brand identity already uses them. They eat space that should go to legibility and rarely add recall value that a clean logo doesn't already deliver.
How Do You Build a Fleet Style Guide and Vehicle Library?
A fleet graphics style guide is the document that keeps twenty vendors across five states producing identical results. Without one, every install shop makes its own judgment call on logo placement, color matching, and font substitutions, and the fleet ends up looking like five separate companies.
The central hub should include exact Pantone or CMYK color values, licensed font files, vector logo files in every required format, print specifications (resolution, bleed, material type), and standardized install specs by vehicle type. Vehicle templates should be tied to precise vehicle data, meaning make, model, year, wheelbase, and roof height, not generic "van" or "truck" placeholders that don't match your actual fleet mix.
Version control matters as much as content. Store everything in one cloud hub, assign a single internal owner responsible for updates, and give every approved vendor read access to the current version only, so nobody installs an outdated logo file six months after a rebrand.
| Style guide component | What it must contain | Why it prevents rework |
|---|---|---|
| Color and typography specs | Pantone/CMYK values, approved font files | Stops vendors from eyeballing color matches |
| Vehicle templates | Make, model, year, wheelbase, roof height | Ensures artwork fits the actual panel, not a generic shape |
| Print and install specs | Material type, resolution, bleed, lamination | Keeps output consistent across print shops |
| QC forms and photo checklist | Required angles, pass/fail criteria | Creates objective evidence for every install |
Standardized photo checklists with defined angles and distances turn QC from a subjective "looks fine" into an objective pass or fail, which matters enormously when you're managing installs you never see in person.
How Should You Sequence Production and Installation?
Vendor selection is where most fleet branding budgets get tested. Before signing anyone, ask for proofs on your actual templates, warranty terms in writing, photo references from prior fleet jobs (not just single-vehicle work), and physical material samples you can inspect under sunlight, not just on a screen.
- Run a pilot on one to three vehicles first. Catch color mismatches, panel-fit issues, or install defects before committing the whole fleet to a flawed template.
- Schedule installs in waves grouped by vehicle type or route density, so you're never pulling more vehicles off the road at once than dispatch can absorb.
- Arrange loaner vehicles or off-peak scheduling for routes that can't tolerate downtime, following rollout scheduling guidance built around minimizing disruption.
- Decide in-house versus full-service vendor based on fleet size: under a dozen vehicles rarely justifies in-house production equipment, while larger fleets sometimes save on recurring costs by bringing print in-house and outsourcing only install labor.
What Does Fleet Branding Actually Cost, and How Do You Track ROI?
Cost per vehicle swings on four levers: coverage level (full wrap versus partial versus lettering), vehicle size, material grade, and installation labor rates in your region. A full wrap on a cargo van costs meaningfully more than cut vinyl lettering on a sedan, and premium cast vinyl with laminate adds cost over calendered vinyl but pays it back in lifespan. Full fleet wrap cost and ROI breakdowns can help you model per-vehicle ranges before you commit to a fleet-wide spec.
Where you economize matters as much as how much you spend:
- Cut coverage area (partial wrap instead of full) before cutting material grade. A smaller area of good vinyl outlasts a larger area of cheap vinyl.
- Standardize base vehicle colors like white or silver across new fleet purchases; it simplifies color matching on future partial wraps and touch-ups.
- Don't shrink the logo or contact number to save print costs. That's the one element the whole program depends on.
Track ROI the same way you'd track any paid channel: dedicated phone numbers, a fleet-specific landing page, and before-and-after call or lead volume over a full quarter. Dedicated tracking numbers and landing pages turn an abstract "brand visibility" investment into a number you can defend at budget time.
What Compliance and Safety Markings Does Your Fleet Need?
Regulatory requirements vary by vehicle type and use, so build compliance into your template from the start rather than bolting it on after design is finalized. Commercial trucks over certain weight thresholds typically require DOT identification numbers, company name, and city/state of registration displayed in specific locations and minimum letter sizes.
Common requirements to plan around:
- USDOT and MC numbers for qualifying commercial motor vehicles, in a legible, permanent format.
- Weight and load markings for vehicles that require them under your operating class.
- Reflective striping or conspicuity tape for trucks and trailers operating in low-light or roadside conditions.
- Clear space reserved on your template for these markings so they don't collide with your logo or contact information.
Requirements shift by state, vehicle class, and industry, so treat this section as a planning checklist, not a final legal answer. When a vehicle or route falls into an edge case (oversized loads, hazmat, cross-border operation), confirm requirements with your regulatory authority or transportation counsel before finalizing artwork.
How Do You Maintain and Extend the Life of Fleet Graphics?
A wrap that looked sharp on install day won't stay that way without a maintenance rhythm built around actual mileage, not a calendar you forget to check. High-mileage vehicles benefit from weekly washes and regular inspection for lifting edges, while lower-mileage or garage-kept vehicles can stretch inspections to a monthly cadence.
- Hand wash or use a touchless wash system; avoid high-pressure washing directly on edges and seams.
- Wipe off bird droppings, fuel spills, and tar promptly, since prolonged contact can stain or degrade vinyl faster than UV exposure alone.
- Photograph any lifting, bubbling, or fading during routine inspections and log it for warranty claims and repair tracking.
- Spot-repair small edge lifts or panel damage quickly; a full rewrap only makes sense once fading or damage spreads across multiple panels.
Consistent wrap maintenance practices can meaningfully extend how long a fleet looks presentable between rewraps, and knowing realistic wrap lifespan expectations helps you budget rewrap cycles instead of reacting to them.
How Do You Sequence a Low-Risk Fleet Branding Rollout?
Running the whole fleet through installation at once is how a branding project turns into an operational headache. A staged rollout catches problems while they're still cheap to fix.
- Audit the fleet first. Confirm exact vehicle makes, models, and years, current condition, and lease status before ordering any templates.
- Select one to three pilot vehicles that represent your most common vehicle type, and run the full design-to-install cycle on them before wave scheduling begins.
- Sequence remaining installs in waves by location or route density, coordinating with dispatch to keep loaner vehicles or schedule gaps in place.
- Apply QC gates at every wave, using the same photo checklist and pass/fail criteria from the pilot, not a looser standard for later batches.
- Monitor post-install for the first 30 to 60 days: check for edge lifting, color drift between vendors, and confirm tracking numbers or landing pages are live before the vehicle hits the road.
An Installer's Take on What Actually Goes Wrong
Most fleet branding problems don't start with design. They start with skipping the pilot and rushing straight to full deployment, which is exactly where mismatched color batches and panel-fit issues surface first. Working out of a climate-controlled facility solves a real, specific problem: temperature and dust variance during install directly affects how vinyl adheres and cures, especially on Tesla panels, where factory paint and camera cutouts leave far less margin for error than people expect.
After protecting more than 1,000 vehicles with manufacturer-backed warranties, the pattern holds: fleets that centralize their specs before ordering artwork spend less on rework than fleets that print first and standardize later.
— Jake
Get Your Fleet Wrapped Right the First Time
Fleet installs benefit from being performed in a climate-controlled facility, which helps prevent dust contamination and temperature-related adhesion failures, resulting in a consistent finish across vehicles. That consistency is the exact problem this guide has been walking you through solving on paper. Manufacturer-backed warranties are important for wrap services, and specialized installation experience helps ensure precise fits on electric vehicle panels comparable to those on gas vehicles.
If you're planning a pilot run or ready to wrap the whole fleet, start with an assessment: we'll review your vehicle mix, current branding assets, and coverage goals, then scope a pilot install before committing to the full rollout. Request a fleet assessment and get pricing and timeline specifics for your actual fleet, not a generic estimate.
Where to Go for Deeper Specs and Compliance Guidance
For the technical details that go beyond this guide, a few sources are worth bookmarking. The fleet graphics style guide framework covers template and QC checklist structure in more depth than any single article can. University brand offices, including Maryland's vehicle branding guidelines, offer a useful model for institutional approval workflows. For scheduling and rollout mechanics, the fleet graphics rollout guide breaks down wave sequencing in more detail.
On the cost side, our own breakdowns of fleet wrap pricing and ROI and PPF versus vinyl wrap tradeoffs fill in the budgeting and material questions this guide only summarized. Keep both close if you're building a business case for a full fleet program.
Sources
- Fleet Graphics Style Guide: Specs, Templates, and QC for Multi-Vendor Installs
- Vehicle Branding - Communications and Public Affairs
- Fleet Graphics Rollout Guide: Selection, Compliance, Scheduling, Maintenance - Wrap Solutions
- 5 Tips For Branding Company Vehicles