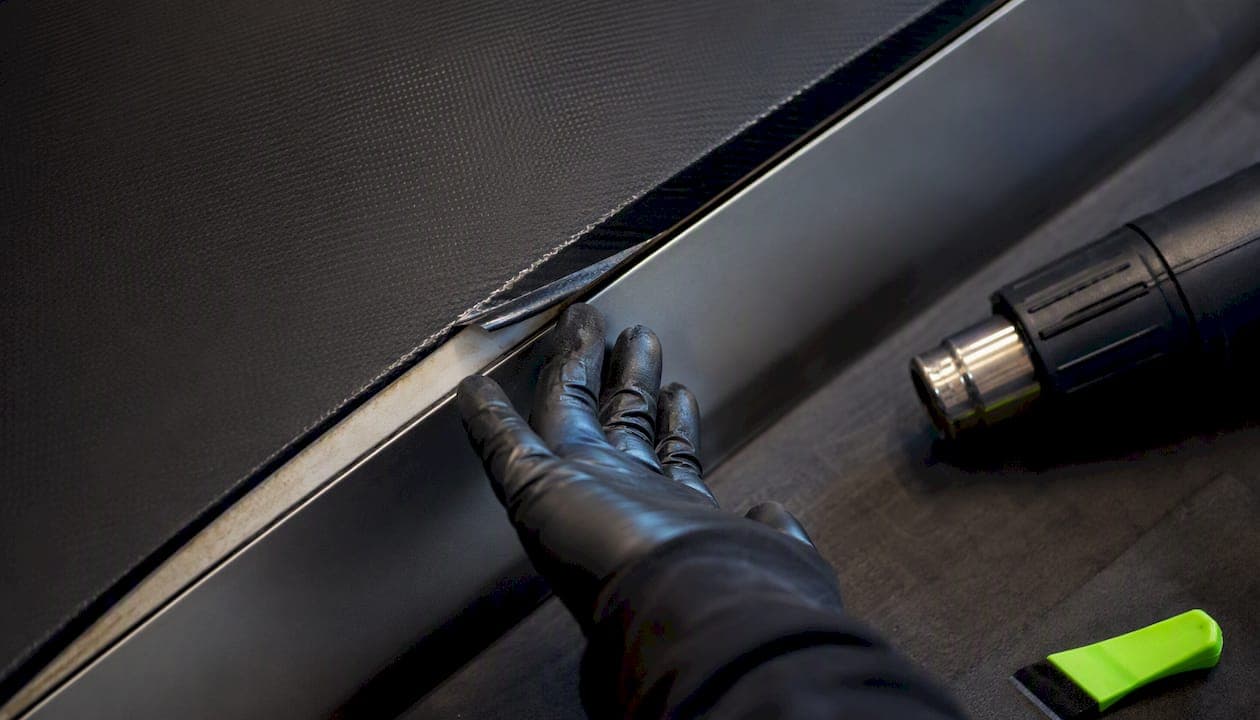
If a wrap edge is lifting, clean it, check whether the film has retreated or just lifted, then decide fast. A lift caught within 30 days can usually be re-heated, pressed, and sealed back down yourself. Shrinkage, contamination, or anything past that window needs a professional repair. Skip the pressure washer and don't yank at the loose corner while you figure out which camp you're in. For practical tips on why wrap edges lift and how to correct them effectively, see Common Tinting Installation Issues: Fix Them Fast.
TL;DR:
- DIY repairs are most effective within 30 days of lift, especially if the lift is uniform along an edge and there is no inward retreat.
- Inward shrinkage or retreated edges indicate material changes requiring section replacement, which cannot be fixed with heat alone.
- Proper surface preparation, timely edge sealing, and controlled post-heat are critical to prevent peelings, with IR thermometers essential for accurate temperature control.
- For lift spots beyond the initial repair window or with shrinkage signs, professional rewrapping and warranty-backed repairs are recommended.
- Repeated DIY attempts can cause more damage and higher costs, so extensive lifts or shrinkage should be handled by experienced installers in climate-controlled environments.
Table of Contents
- Quick Triage: Safe Steps To Stop A Lift From Spreading
- Reading The Failure Pattern Before You Touch A Heat Gun
- How To Re-Bond A Small Lifted Edge Yourself
- Edge Sealers, Primers, And The Tools That Actually Matter
- Preventing Peeling Before It Ever Starts
- When DIY Isn't Enough: Calling In A Professional
- What Separates A Reliable Wrap From One That Peels In A Year
- DIY Or Pro: An Honest Read On When Each Makes Sense
- Professional Wrap Repair And Warranty-Backed Rework
- Sources
- FAQ
Quick Triage: Safe Steps To Stop A Lift From Spreading
The first ten minutes matter more than most owners realize. A small lift left alone in direct sun or hit with a pressure washer nozzle turns into a six-inch peel by the weekend. Work through this order before you touch heat or sealer:
- Park in shade and leave the wrap alone. Pulling or picking at a lifted corner tears fibers in the vinyl and turns a fixable edge into a section that needs replacement.
- Wipe the lifted area with a wrap-safe cleaner, then follow with 70% isopropyl alcohol (IPA) on a clean microfiber to strip oils, wax, and road film.
- Let it dry completely. Trapped moisture under heat just creates steam blisters, which is a worse problem than the one you started with.
- Warm the lifted section gently with a variable-temp heat gun or hair dryer. If you own an IR thermometer, use it. Guessing at heat by feel is how people scorch vinyl.
- Press the edge flat with a felt squeegee while it cools, holding pressure for several seconds so the adhesive re-bonds instead of springing back up.
- If the area is clean, dry, and still within the repair window, apply a liquid edge sealer to lock the seam.
Pro Tip: Keep a $15 infrared thermometer in your glovebox. Eyeballing heat gun temperature is the single biggest reason DIY re-heats fail. A quick point-and-shoot read tells you exactly what the film surface is doing before you commit.
Reading The Failure Pattern Before You Touch A Heat Gun
Not every lifted edge has the same cause, and treating them all the same way wastes time and sometimes ruins the wrap. The visible pattern tells you almost everything about what went wrong during installation and what will actually fix it.
A uniform lift along a straight edge, with no shrinking inward, usually points to inadequate post-heat during install or surface contamination the installer missed. This type responds well to re-heating. An inward retreat, where the film has visibly pulled back from where it was originally trimmed, signals calendered-film shrinkage. Heat won't fix that. The material has physically changed dimension, and the only real remedy is cutting out and replacing that section, often with a heavier cast vinyl. A thin lift right at the cut line, with the rest of the panel still bonded tight, is almost always an edge-seal failure. Moisture worked its way under an unsealed cut edge. And lifting that shows up specifically during hot months, spreading across multiple panels rather than staying localized, points to adhesive heat degradation, which is a material or install-quality issue rather than something you caused.
| Fingerprint | Likely cause | Recommended fix | Time window |
|---|---|---|---|
| Uniform edge lift, no retreat | Insufficient post-heat or contamination | Re-heat, press, seal | Best within 30 days |
| Inward retreat / shrinkage | Calendered film shrinking | Section replacement, consider cast vinyl | Not heat-repairable |
| Thin lift at cut edge | Edge-seal never applied or failed | Clean and apply liquid edge sealer | Within days of noticing |
| Multi-panel heat-season lift | Adhesive heat degradation | Professional assessment, possible rewrap | Varies by extent |
The visible failure fingerprints and their remedies matter because re-heat repairs succeed more than 70 percent of the time within the first 30 days but that success rate drops below 40 percent once you're past 30 to 60 days, since the adhesive has effectively cured in its lifted position by then.
How To Re-Bond A Small Lifted Edge Yourself
For a lift without inward retreat, spotted early, this is a job most patient DIYers can handle with a handful of tools.
- Clean the lifted section and about two inches around it with IPA, then let it dry fully. Any grease or wax left behind will just repeat the failure.
- Heat the surface to roughly 65 to 70°C (149 to 158°F), holding the gun moving so you don't concentrate heat in one spot. This range is warm enough to soften the adhesive without cooking the vinyl's finish.
- Press the film down immediately with a felt squeegee, working from the bonded area toward the loose edge, and hold firm pressure for 8 to 10 seconds while it cools.
- Once the seam is flat and cool, apply edge sealer or adhesion promoter along the cut line with a microbrush, keeping it off the visible face of the wrap.
- Let the sealer cure fully, following the product's stated time, before washing the vehicle or exposing it to rain.
If the edge sits near a panel gap, tuck it slightly rather than stretching it flat. Overstretched vinyl thins out and loses grip strength right where you need it most. And if you find yourself heating the same spot a second or third time, stop. Repeated overheating degrades the film's finish and adhesive, and if the pattern looks like inward retreat rather than a simple lift, no amount of heat will fix shrinkage. That's a section-replacement job.
Pro Tip: Test your heat gun's actual output on a scrap piece of vinyl first. "Medium" on one gun can be 100 degrees hotter than "medium" on another, and that gap is exactly what causes DIY re-heats to blister instead of bond.
Edge Sealers, Primers, And The Tools That Actually Matter
Liquid edge sealer works by coating the exposed adhesive at a cut line so moisture and air can't work their way underneath. Applying it within minutes of trimming encapsulates the raw edge before it has a chance to pick up contamination, which is why timing matters as much as the product itself.
- Liquid edge sealer is the standard choice for door jambs, mirrors, and anywhere the wrap meets a hard edge repeatedly.
- Edge-seal tape works on flatter, low-flex areas but tends to lift on tight curves where liquid sealer flexes better.
- Adhesion promoters help in spots where the substrate itself is porous or textured, giving the adhesive something better to grip.
- Always test any sealer or promoter on a scrap panel or hidden spot first. Some formulations haze certain vinyl finishes.
- A variable-temp heat gun, an IR thermometer, and a fresh blade round out the minimum kit. Dull blades drag and lift fibers instead of cutting clean.
Treat edge sealing as mandatory rather than optional on fleet vehicles, anything near marine or coastal air, and any wrap with tight compound curves. Those are exactly the conditions where an unsealed cut edge fails first.
Preventing Peeling Before It Ever Starts
Most edge failures trace back to what happened before the wrap ever touched the car. A proper surface-prep protocol includes a full wash, a clay bar pass, and a two-cloth IPA degrease to strip wax, sealant, and silicone residue that vinyl adhesive can't bond to.
- Ask any installer whether they verify post-heat temperature with an IR thermometer rather than going by feel or timer alone.
- Confirm edge sealing happens within about 30 minutes of trimming, not at the end of the day as an afterthought.
- Wait 24 to 48 hours after installation before washing the vehicle at all.
- Hand wash or use touchless methods going forward, and keep pressure washers pointed away from panel edges and seams permanently.
- Run a visual check on edges every few weeks, since catching a lift in its first days is what makes DIY repair realistic. For a broader routine, wrap-specific maintenance guidance covers washing and coating options in more depth.
When DIY Isn't Enough: Calling In A Professional
Some failures are shop jobs from the start. Film that has visibly retreated inward, lifting where you can see discoloration or grime trapped underneath, a lift that comes back after you've already tried to fix it, or peeling spread across a large panel area all point past what a heat gun and sealer can solve.
A reputable shop will run a proper diagnostic, verify surface temperature with an IR thermometer during any re-heat attempt, and replace sections outright rather than fighting a losing repair. For chronic problem areas, they may recommend upgrading to cast vinyl, which resists shrinkage far better than calendered film. Ask about warranty coverage and whether the install happens in a climate-controlled space, as dust and temperature swings during application are common hidden causes of edge failure.
What Separates A Reliable Wrap From One That Peels In A Year
Edge failure is rarely random. It traces back to what happened in the bay during install: whether the surface was actually clean, whether post-heat hit the right temperature, and whether the cut edge got sealed before it ever saw moisture. Some wrap installers run every wrap installation in a climate-controlled facility to avoid dust and temperature swings, which are common hidden causes of edge failure, and consider IR-verified post-heat an important step.
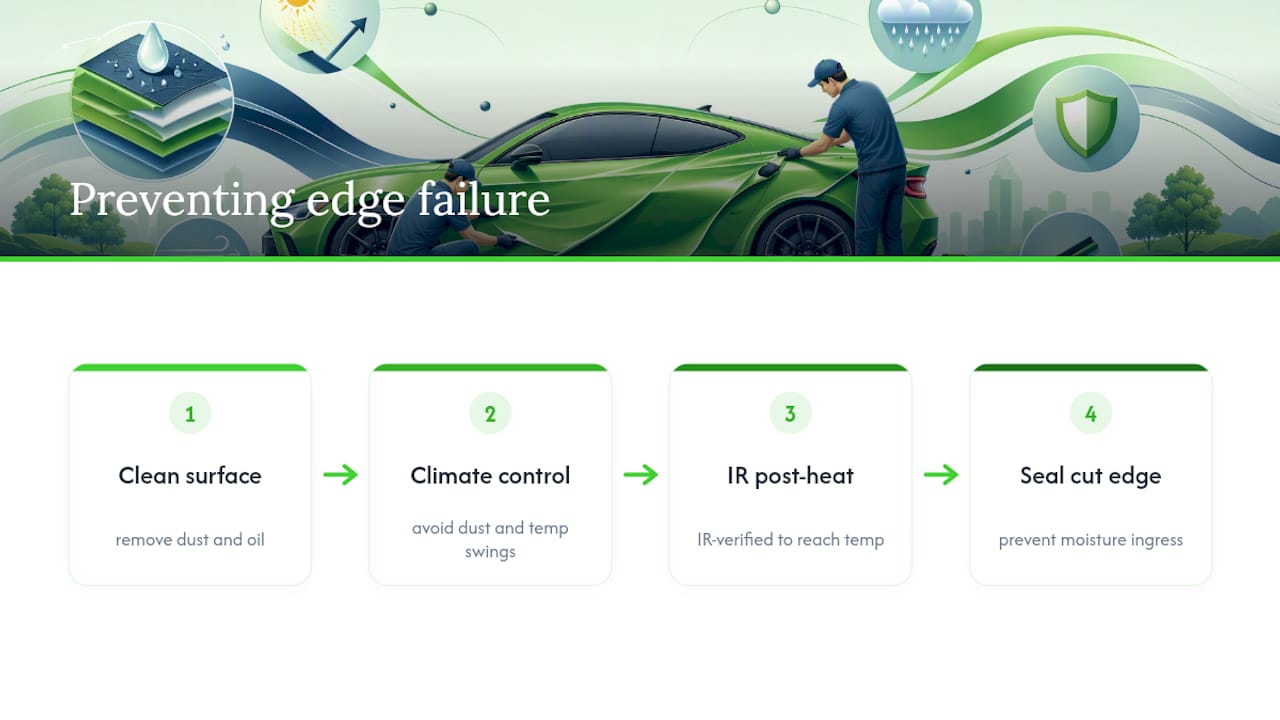
Some shops have extensive experience, manufacturer-backed warranties, and protocols for edge-sealing and post-heat designed to prevent common edge failure issues. This piece was reviewed with input from Jake, a contributing voice on the Tint & Wraps Customs editorial team.
DIY Or Pro: An Honest Read On When Each Makes Sense
DIY re-heat and seal makes sense for a small, recent lift you caught within a few weeks, on a car you're not precious about getting perfect. Anything involving shrinkage, contamination, or a repeat lift after you've already tried once belongs with a professional. Patching the same spot three times over a year almost always costs more in materials and frustration than one proper repair backed by a warranty would have.
— Jake
Professional Wrap Repair And Warranty-Backed Rework
Watching a DIY re-heat fail for the third time gets expensive fast, in both materials and patience. Professional edge repair, resealing, and full section replacement often involve a climate-controlled bay, IR-verified post-heat, and manufacturer warranties rather than uncertain adhesive performance.
An inspection typically starts with identifying whether you're looking at a simple lift or actual film shrinkage, since that distinction decides whether a repair or a rewrap makes more sense. If a whole panel or wrap is showing its age, the team can also walk you through options on the vinyl wraps service page, including color-change and chrome-delete finishes for anyone considering a refresh instead of a patch. Book an inspection through the vehicle wraps page and get a straight answer on what your edges actually need.
Sources
For readers who want the technical detail behind these repair windows and temperatures, the HighCool guide to vinyl wrap peeling causes covers re-heat temperature ranges and success-rate timelines in depth. TeckWrap's installation guide on fixing lifting vinyl edges walks through cleaning and adhesion-promoter technique. VinylWrapro's DIY and pro repair breakdown sets realistic expectations for when to stop patching and call a shop.
- Vinyl Wrap Peeling: 6 Causes and How to Fix Each One – HighCool
- A Comprehensive Guide to Vehicle Wrap Edge Sealing: Tips and Tricks for a Long-Lasting Wrap
FAQ
How Do You Seal The Edges Of A Vinyl Wrap?
Clean the cut edge with IPA, let it dry, then apply liquid edge sealer with a microbrush within about 30 minutes of trimming so it encapsulates the exposed adhesive before moisture gets underneath.
How Can I Fix A Peeling Vinyl Wrap Myself?
Clean the lifted area, warm it to roughly 65 to 70°C (149 to 158°F), press it flat with a felt squeegee while it cools, then seal the edge. This works best on lifts caught within the first 30 days, before the adhesive cures in its lifted position.
What Is The Best Edge Sealer For A Vinyl Wrap?
Liquid edge sealers applied right after trimming tend to outperform edge-seal tape on curved panels, since they flex with the surface instead of lifting at the corners. Some professional wrap installers apply edge sealer as a standard step rather than an optional add-on.
Do Car Wraps Peel Easily?
Not when installed correctly. Most peeling traces back to skipped post-heat, unsealed cut edges, or contamination on the panel before the wrap went down, not a flaw in the vinyl itself.