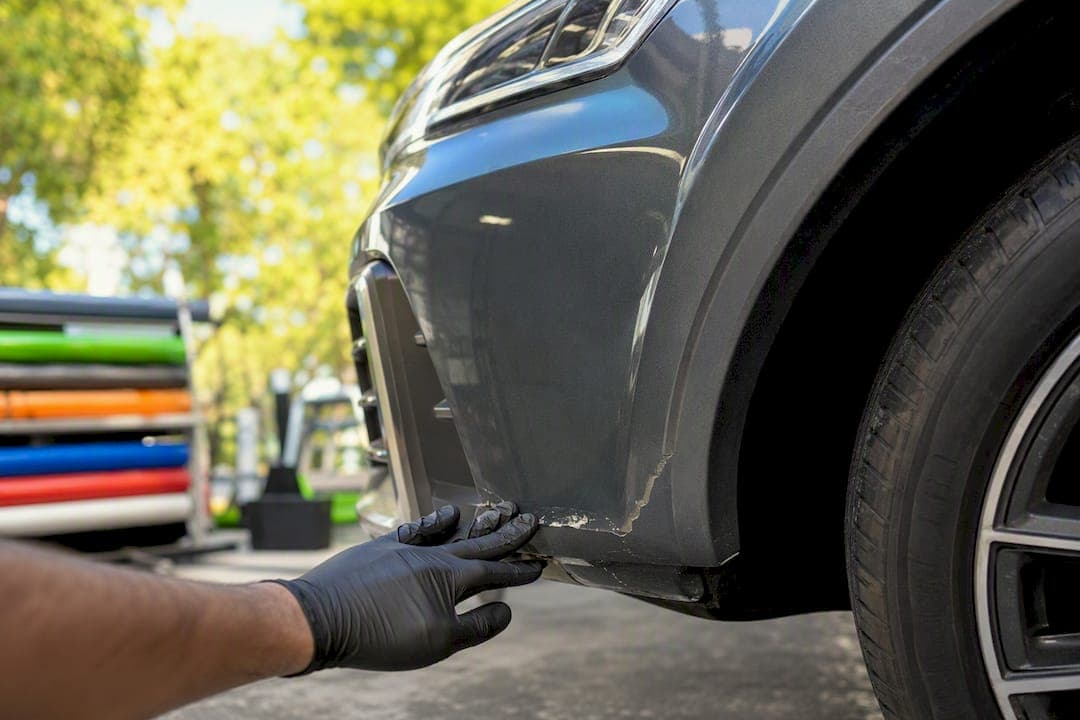
Yes, Tesla paint chips more easily than most legacy luxury brands, and the fix starts in the next fifteen minutes, not next week. If you just spotted a chip, clean the area, seal it if bare metal is showing, photograph it for your records, and then decide whether it needs a DIY touch-up or a shop visit.
Here's your fast triage:
- Clean it. Wipe away dirt and road grime with a microfiber cloth and a bit of water. No aggressive scrubbing.
- Photograph it. Get a straight-on shot and an angled shot with your phone's flash off, plus a wide shot showing the panel for context.
- Seal it if needed. If you can see bare metal, a dab of clear nail polish or a touch-up pen buys you time before rust sets in.
- Assess size and location. A pinhead chip on a fender is a different problem than a quarter-inch gouge on the hood's leading edge.
- Think ahead. If you're seeing repeat chips, paint protection film on the high-impact zones will save you money over the next few years.
Tesla's factory clear coat and base coat combine into a thinner overall stack than what you'll find on many German or Japanese luxury vehicles, and the low, flat front-end styling on the Model 3 and Model Y catches debris at a worse angle than a more sloped hood. Prevention beats repeated touch-ups almost every time.
Pro Tip: When you photograph a chip, include the VIN sticker or door jamb plate in one frame and note your odometer reading. If you ever need to make a warranty or insurance case, that timestamp and mileage record matters more than the chip photo itself.
Key Takeaways
Tesla paint chips more readily than most legacy luxury vehicles because of a thinner factory paint stack and flat front-end design, and paint protection film applied early is the most reliable prevention available.
| Point | Details |
|---|---|
| Act fast on fresh chips | Clean, photograph, and seal bare metal within the same day to stop rust from starting. |
| Know your risk zones | Hood edge, front bumper, mirrors, and rocker panels take the most strikes on any Tesla. |
| DIY works for small chips | Use OEM or Dr. ColorChip-style kits for chips under 3mm without base-coat damage. |
| Warranty rarely covers road debris | Tesla's limited warranty excludes chips from outside causes; document delivery-day defects fast. |
| PPF prevents chips, ceramic does not | Tint & Wraps Customs installs manufacturer-backed PPF on Teslas in a climate-controlled facility. |
Table of Contents
- Where Tesla Paint Chips Most Often
- Why Does Tesla Paint Chip So Easily?
- What to Do the Moment You Spot a Chip
- DIY Paint Chip Repair: Step-by-Step Method
- When a Professional Repair Beats DIY
- PPF vs Ceramic Coating: What Actually Stops Chips
- How Much Does It Cost and How Long Does It Take?
- Does Tesla's Warranty Cover Paint Chips?
- What Installers See That Owners Don't
- Protect Your Tesla Before the Next Rock Chip
- Sources
Where Tesla Paint Chips Most Often
Chips don't land randomly. They cluster in five predictable zones, and knowing them helps you inspect smart instead of crawling around the whole car.
- Hood leading edge — the first surface to meet airborne debris at highway speed.
- Front bumper and lower valance — low ground clearance means constant exposure to kicked-up gravel.
- Side mirrors — they sit in the direct wind stream and catch debris other panels deflect.
- Rocker panels ahead of the rear wheels — tire spray from your own front wheels sandblasts this area over time.
- A-pillars and door leading edges — wind resistance pushes small particles into these creases at odd angles.
Each zone shares one trait: a steep or direct angle of impact. A pebble that would skip harmlessly off a sloped hood hits a Tesla's flatter front end almost head-on.
To inspect without special tools, run your fingertip lightly across the paint (not your fingernail) in good daylight. Early-stage chips feel like a tiny dent with intact paint around the edges. A chip that's gone through to bare metal will show a bright, silvery dot at the center instead of colored paint.
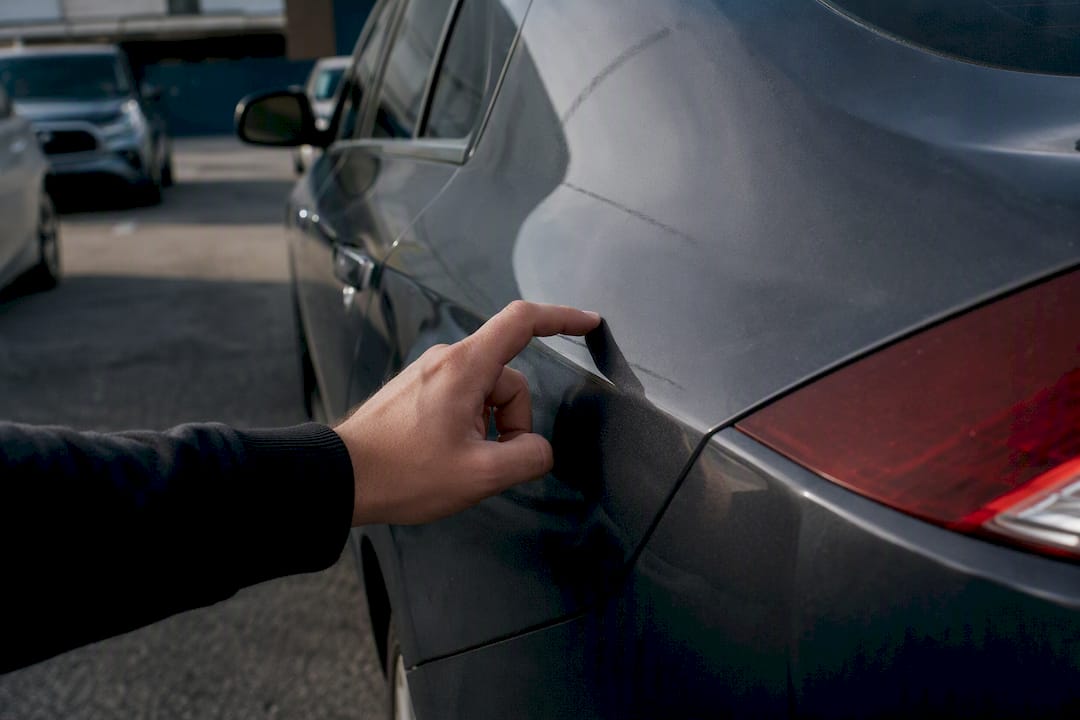
Detailer measurements commonly put total Tesla paint stacks around 80 to 110 microns, versus 120 microns or more on many established luxury marques. That's a real margin difference when a pebble hits at 65 mph.
Pro Tip: Check your mirrors and rocker panels monthly if you do highway commuting. They chip first and worst, and catching damage early is the difference between a $30 touch-up pen and a $400 spot repair.
Why Does Tesla Paint Chip So Easily?
Rock chips happen when the kinetic energy of flying debris exceeds what the clear coat and base coat can absorb. On a thinner paint stack, that threshold is lower, so the same size pebble that bounces off one car's hood punches straight through on a Tesla.
Design geometry compounds the problem. Tesla's upright front fascia, low front bumper, and minimal front overhang put more surface area directly in the path of kicked-up road debris. Wheel-throw geometry, meaning the arc that a spinning tire flings gravel and sand along, sends material straight at the rocker panels and lower doors.
Environmental and usage patterns matter just as much as design:
- High-speed highway driving multiplies impact energy exponentially, not linearly.
- Gravel roads and construction zones dramatically increase debris volume in the air.
- Winter road salt and grit add abrasive particles that chip paint and accelerate corrosion once a chip exists.
- Long daily commutes simply mean more exposure time, which means more chances for a strike.
Material chemistry plays a role too. Tesla, like most automakers now, uses water-based, lower-VOC paint formulations for environmental compliance. These formulas tend to produce a thinner overall paint film than older solvent-based systems, and detailers who measure Tesla panels regularly report readings that back this up in independent gauge testing. Paint depth gauges measure the full stack rather than isolating the clear coat alone, so treat any specific clear-coat number you see online as an estimate, not a lab spec.
What to Do the Moment You Spot a Chip
Speed matters here more than perfection. A fresh chip with exposed metal starts oxidizing within days, especially in humid or salty climates.
- Photograph it immediately. Wide shot, close-up, and a shot including your VIN plate or odometer for the record.
- Clean the area gently. Isopropyl alcohol on a microfiber cloth removes grime without introducing more scratches.
- Check for bare metal. If you see a bright silver dot rather than colored paint at the chip's center, seal it the same day.
- Apply a temporary seal. Clear nail polish or a touch-up clear coat pen stops moisture and oxygen from reaching bare metal.
- Avoid automatic car washes with brush systems until you've sealed or repaired the chip.
- Log the date and mileage. This record matters if you later pursue a warranty or insurance claim.
Not every chip needs a rush job. But a few signs mean don't wait:
- Bare metal visibly exposed with no paint ring around it.
- Any orange or brown discoloration, which signals rust has already started.
- A crater larger than a pencil eraser, especially on a structural edge like the hood or door.
Keep a small emergency kit in your glovebox: a color-matched touch-up pen, isopropyl alcohol wipes, a microfiber cloth, and a fine-tip applicator. It costs less than $25 total and can be the difference between a hidden fix and a visible scar six months later.
Pro Tip: Take your documentation photos in overcast daylight or under indoor LED light, never direct sun. Harsh sunlight creates glare that hides the true depth of a chip, which matters if a shop or insurer needs to assess severity later.
DIY Paint Chip Repair: Step-by-Step Method
Small chips, meaning anything smaller than a pencil eraser that hasn't cracked through to bare metal over a wide area, are genuinely fixable at home if you're patient and methodical. Anything larger, anything on a compound curve, or anything where the base coat has lifted away from the surrounding paint is better left to a shop.
When DIY makes sense:
- Chip diameter under 3mm with clean edges
- Located on a flat or gently curved panel, not a tight corner
- You're comfortable working slowly and can wait for proper cure time
- Color is a common single-stage shade rather than a complex tri-coat pearl or metallic
When to skip DIY:
- Multiple chips clustered together suggesting deeper impact damage
- Any sign of rust already forming
- Pearl white, red multi-coat, or other layered colors where blending is tricky
- You need the repair invisible for a resale inspection
Materials that actually work:
- Tesla's OEM Paint Repair Kit, sold directly through Tesla's online shop, gives you a factory color match without guesswork.
- Dr. ColorChip-style kits use a fill-and-blend method that independent detailing guides consistently rate as effective for small chips when prep and technique are followed carefully.
- Fine detail brushes or toothpicks for controlled application.
- Blending solution to feather the edges so the repair doesn't sit as a raised bump.
- Isopropyl alcohol for degreasing before you start.
- Micro-fine polishing pads for the final leveling pass.
The step-by-step method:
- Clean thoroughly. Degrease the chip and surrounding half-inch with isopropyl alcohol. Any wax, sealant, or ceramic coating residue will stop the touch-up paint from bonding.
- Prep the chip. Use a fine-tip applicator or toothpick, not a wide brush, to avoid spreading paint outside the chip boundary.
- Fill in thin layers. Apply a small amount, let it dry per the kit's instructions, then add another thin layer if needed. Thick single applications shrink unevenly as they cure.
- Blend the edges. Use the kit's blending solution to soften the transition between new paint and original finish.
- Let it cure fully. Most kits need 24 to 48 hours at room temperature. Cold garages or high humidity slow this down significantly, so check the product's temperature guidance.
- Finish and protect. Once cured, a light clear-coat dab and a gentle polish pass bring back gloss without cutting through the surrounding clear coat.
Color-match expectations depend heavily on your paint type. Single-stage colors like standard black or basic white are forgiving. Multi-stage pearl whites and Tesla's deeper reds involve layered tinting that's genuinely hard to match at home. A careful DIY repair on those colors will look acceptable from three feet away in normal lighting, but won't disappear under close inspection or direct sun. Set that expectation before you start, not after.
The most common mistakes: painting directly over old wax or ceramic coating without degreasing first, applying one thick blob instead of thin layers, sanding too aggressively and cutting into surrounding clear coat, and polishing the repair before it's fully cured, which drags the soft paint and ruins the finish.
Pro Tip: After the base touch-up cures, a tiny dab of clear coat over just the repaired spot, followed by 48 hours of no washing or direct sun exposure, meaningfully improves how long the fix holds up. Cover the car or park it in shade while it sets.
When a Professional Repair Beats DIY
Severity dictates the right call more than personal preference does. A small surface-level chip that hasn't reached the base coat is a reasonable weekend project. A deep chip that's cracked into the base coat needs a spot-fill and blend from someone with spray equipment. Widespread chipping across a whole panel, the kind you see on cars that have logged thousands of highway miles unprotected, usually calls for a full-panel respray to get a uniform result.
Professional repair generally falls into three tiers:
- Spot-fill and blend, where a technician feathers new paint into the surrounding area on a small section of the panel.
- Local respray and blend, covering a larger area like a full bumper corner or fender edge.
- Full-panel repaint, reserved for extensive chipping, prior repair failures, or when resale value depends on a flawless finish.
| Repair Scenario | Typical Approach | What Affects Price |
|---|---|---|
| Single small chip | Spot-fill and blend | Color complexity, panel access |
| Cluster of chips on one panel | Local respray and blend | Blend size, paint type (single vs multi-stage) |
| Widespread panel chipping | Full-panel repaint | Panel removal needs, prep labor, shop rates |
Independent reporting on repair costs shows a wide spread, with spot repairs often running several hundred dollars and larger blend or respray work climbing toward $1,700 depending on scope and market. Location, paint complexity, and how much blending is required to hide the repair all move that number.
Look for three things when choosing a shop: documented Tesla-specific experience, a climate-controlled installation space (dust and temperature swings ruin paint work), and a willingness to show before-and-after photos of actual Tesla repairs, not stock images. A shop offering a manufacturer-backed warranty on any protective film work is a strong signal they stand behind their process.
If road debris caused the damage, your auto insurance's comprehensive coverage may apply, though most policies carry a deductible that makes small chips not worth filing a claim over. Keep your dated photos and mileage log regardless. That documentation is what turns "I think this happened on the highway" into a supportable claim.
Pro Tip: Ask any shop quoting a respray how they'll blend the edge into the adjacent panel. A shop that can't explain their blending technique clearly is one to skip.
PPF vs Ceramic Coating: What Actually Stops Chips
Paint protection film stops rock chips. Ceramic coating does not, and that distinction gets lost in a lot of marketing. PPF is a thick, sacrificial urethane layer, often 150 to 200 microns, that physically absorbs the impact energy from flying debris before it ever reaches your factory clear coat. Ceramic coating is a hard, thin chemical layer, usually just a few microns, that improves gloss retention, makes washing easier, and resists chemical staining and UV fading. It does nothing to blunt the force of a pebble hitting at 65 mph.
For a daily-driven Tesla, we typically recommend PPF coverage on the five high-impact zones covered earlier: the full front bumper, hood leading edge, side mirrors, and rocker panels. Owners who drive heavy highway miles or live near gravel or construction routes often consider full-front coverage or a full-body wrap of film for maximum peace of mind. You can review specific package breakdowns for the Model 3 and Model Y or compare film brands before deciding on coverage level.
Application order matters and it's not optional: PPF goes directly onto clean factory paint first. Ceramic coating, if you want both, goes on top of the film afterward. Reversing that order or applying either product improperly is a common source of installation damage, so choose an installer who works with both regularly.
On the warranty question, federal Magnuson-Moss protections generally prevent a manufacturer from voiding your entire vehicle warranty simply because you installed aftermarket PPF. That said, damage caused during a botched install or removal isn't covered by that protection, which is exactly why a manufacturer-backed installation warranty from your PPF shop matters. Tint & Wraps Customs has protected more than 1,000 vehicles in a climate-controlled facility, with Tesla-specific installation experience and warranty-backed film work.
| Protection Type | Prevents Rock Chips? | Best Use |
|---|---|---|
| Ceramic coating | No | Gloss, UV resistance, easier cleaning |
| Paint protection film | Yes | Physical impact barrier on high-strike zones |
| PPF + ceramic combined | Yes (from the film) | Maximum protection plus easier maintenance |
Pro Tip: The best time to protect a new Tesla is delivery day, before the first highway mile. The first 1,000 to 3,000 miles carry the highest chip risk simply because that's when most owners haven't yet protected the car and are still driving normally on unfamiliar routes.
How Much Does It Cost and How Long Does It Take?
Budget depends heavily on what you're fixing and how far you want to go with prevention.
| Service | Typical Cost Range | Typical Timeline |
|---|---|---|
| DIY touch-up kit | $40 to $400 | 24 to 48 hours to cure |
| Professional spot repair | Several hundred dollars | 1 to 3 days |
| Full-panel respray | Up to roughly $1,700 | 24 to 48 hours |
| Partial front PPF | Varies by market and coverage | 1 to 2 days |
| Full-body PPF | Varies by market and coverage | 3 to 5 days |
The wide range on professional work comes down to color complexity, how many panels need blending, and regional labor rates. A single-stage black bumper touch-up costs far less than blending a multi-coat pearl white fender into an undamaged hood.
Here's the math that convinces most highway commuters: spot repairs can climb toward $1,700 for extensive work, and that's per incident. One round of PPF on the high-impact zones is typically a single upfront cost that then prevents years of repeat chip repairs. For anyone logging serious highway miles, the PPF cost breakdown is worth reviewing before you spend money on a third touch-up pen.
Does Tesla's Warranty Cover Paint Chips?
No, not typically. Tesla's New Vehicle Limited Warranty is built to cover manufacturing defects, not damage from road debris, gravel, or everyday driving conditions. If a chip happened because a rock hit your bumper on the highway, that's excluded from coverage under Tesla's standard warranty terms.
Where you do have a real shot at coverage is a genuine factory defect, meaning a spot where paint was thin, missing, or improperly cured straight from the factory. Inspect your car thoroughly within 72 hours of delivery, photograph anything suspicious, and file a service request immediately with that documentation attached. Waiting weeks to report a delivery-day flaw weakens your case considerably.
One more thing worth knowing: installing aftermarket PPF should not void your Tesla's warranty outright under Magnuson-Moss protections, though damage caused by a poor installation or removal job isn't covered by that shield.
For any claim, gather these before you contact Tesla or your insurer:
- Dated, well-lit photos from delivery day and from when you noticed the chip
- Your delivery inspection notes or timestamp
- Current mileage at time of discovery
- Any prior service requests referencing the same panel
What Installers See That Owners Don't
Working on Teslas day after day, the chip pattern repeats itself almost identically. Front bumpers and hood edges take the worst of it, mirrors take a surprising amount of hits given their small surface area, and rocker panels quietly accumulate damage that owners don't notice until they're washing the car and run a hand along the lower door.
The clearest before-and-after comes from partial front PPF installed early. Cars protected on delivery day routinely show zero new chips on covered panels after a year of daily highway driving, while an identical unprotected car from the same delivery batch shows a dozen small strikes in the same period. That gap is the whole argument for prevention over repeated touch-ups.
Protect Your Tesla Before the Next Rock Chip
Tint & Wraps Customs specializes in Tesla-specific paint protection film and ceramic coating installs, done in a climate-controlled facility in Van Nuys where dust and temperature swings never compromise the film's bond to your paint. That controlled environment is the difference between a install that holds for years and one that starts lifting at the edges within months.
We've protected more than 1,000 vehicles, back our PPF installs with manufacturer-backed warranties, and hold a 5-star rating from Tesla owners across the San Fernando Valley who wanted their front end covered before the first rock chip, not after the fifth. Whether you're weighing partial front coverage or full-body film, our team will walk you through exactly which zones matter most for your driving habits. Ready to stop chips before they start? Book your Tesla protection consultation and get your car scheduled in our climate-controlled bay.
Sources
For deeper reading beyond this guide, LegalClarity's warranty breakdown covers the legal specifics of Tesla's coverage exclusions. Obsidian Auto's paint analysis explains the material science behind Tesla's thinner paint stack. For hands-on repair steps, Green Mount Motors' DIY guide walks through the touch-up process in detail, and Tesla's own Paint Repair Kit page confirms what's included in the factory-matched kit.
- Does Tesla Warranty Cover Paint Chips? Fixes and Legal Options - LegalClarity
- Why Tesla & EV Paint Chips So Easily | Obsidian Auto
- Greenmountmotors
- Tesla Paint Quality Issues in 2025 Models: Why It's Thin and Prone to Chipping