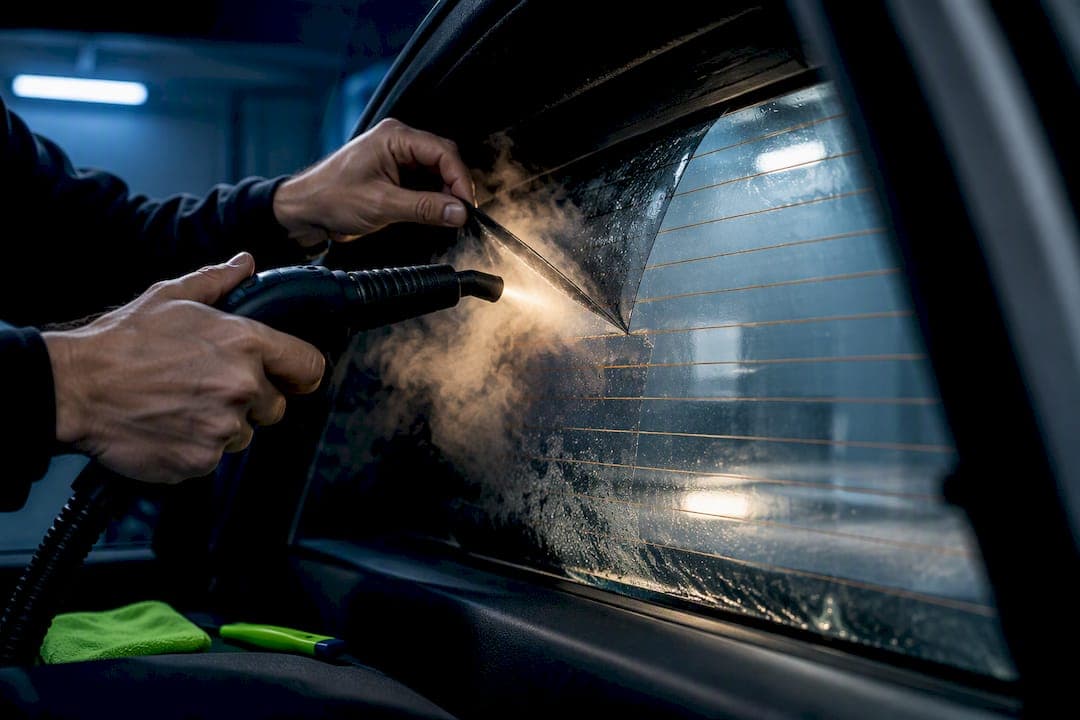
Tinting a rear window rarely harms an intact defroster grid, but removing old film can pull conductive material off the glass if it is scraped instead of steamed. If you are getting tint installed or removed, inspect the grid first and insist on a steam based process. The sections below walk through how the grid works, what actually breaks it, how to diagnose damage, and how to repair or prevent it.
TL;DR:
- Proper removal involves steaming the film to soften adhesive, followed by peeling parallel to the gridlines to avoid lifting the conductive paint.
- Steel blades and scraping across the lines significantly increase the risk of damaging the conductive layer, especially on older, heavily cured tint.
- Conductive paint lines may appear intact but can still fail the continuity test, making multimeter checks essential before reinstalling new tint.
- Repair kits can fix small breaks but are unreliable for extensive damage; full glass replacement is required if bus bar tabs or multiple lines are compromised.
- Shops should document grid conditions, conduct pre- and post-removal testing, and use climate-controlled facilities to prevent grid damage during tinting or removal.
Table of Contents
- How rear defroster grids are built and why it matters for tint
- Common causes of defroster damage during tint removal
- The steam-first method shops use for safe removal
- How to diagnose defroster damage after removal
- Repair options and what they typically cost
- When to call a professional and what to ask them
- A prevention checklist before you tint or remove tint
- Why Tint & Wraps Customs handles rear glass differently
- What actually protects a defroster grid
- How our shop handles rear window tinting and removal
- Sources
- FAQ
How rear defroster grids are built and why it matters for tint
A rear defroster grid is not a wire embedded in the glass. It is a conductive paint printed onto the inside surface and baked on, connected to bus bars, the thicker strips at each end that carry current through soldered tabs. That printed layer sits right where window film adhesive also sits, which is the root of the problem.
Fresh tint applied over an intact grid usually has nothing to grip but glass and the top of the conductive line, so a properly cured install carries little risk. Removal is different. Once film adhesive has cured for months or years, it can bond directly to the tiny conductive particles that make up the line, according to ProView Arizona. Pulling the film off in the wrong direction, or scraping it, can lift that bonded conductor right along with it. That is why installation and removal carry very different levels of risk even though they involve the same glass.

Common causes of defroster damage during tint removal
Most defroster damage traces back to a handful of avoidable mistakes rather than the tint itself. Razor blades are the biggest offender: dragging a metal blade across a gridline, especially near a bus bar, can shave conductive material straight off the glass. Pulling film perpendicular to the lines instead of parallel to them puts direct stress on the print and increases the chance of lifting it.
Older film raises the stakes. Sun-baked tint that has started to flake or discolor has usually cured its adhesive deep into the surface texture, including around the edges of the conductive lines, which makes the bond to the conductor stronger and harder to release cleanly.
- Metal razors or steel scrapers used directly on or near gridlines and bus bars
- Peeling film against the grain of the lines instead of along it
- Uncontrolled heat guns that create hot spots and uneven adhesive release, which invites scraping to finish the job
Heat guns without a steady, even application can soften one spot while leaving the next section stubborn, and that unevenness is often what pushes an installer to grab a blade.
The steam-first method shops use for safe removal
Steaming is the removal method preferred across the industry for rear glass with defroster lines, because it softens the adhesive evenly so the film releases in sheets instead of shredding, according to Glacier's tint removal guide. Rear glass removals typically take from several minutes up to around an hour, depending on the age of the film and how deeply the adhesive has cured, a range Glacier attributes to these factors.
- Apply steady steam heat across the film until it starts to lift on its own at the edges.
- Peel in the direction parallel to the gridlines, never across them, using fingertips or a plastic scraper.
- Keep any steel blade completely away from bus bars and printed lines.
- Finish with a water-break test and a full visual inspection of the grid before new film goes on, and photograph the glass for a record.
Pro Tip: Ask your installer to steam a small test section first. If it releases cleanly there, the rest of the window will behave the same way.
Our guide to shop-proven tint removal covers this process in more detail, including how bus bar damage typically happens.
How to diagnose defroster damage after removal
Before assuming the worst, run through a quick sequence that moves from the eyes to a meter.
- Look and feel: an intact line has a slight physical ridge and a consistent pigment. A patch that looks lighter or feels perfectly smooth usually means the conductor is gone, per Frost Fighter's technical bulletin.
- Power it on: turn the defroster on and watch the clearing pattern. A line that never clears, while the ones around it do, points to a break.
- Multimeter continuity: touch a probe to each bus bar, or along a line using foil to avoid scratching the glass, to confirm current is actually flowing.
A line can look fine and still fail the continuity test, so skipping the meter step can mean missing real damage. Work carefully around the tabs, since they carry live current when the defroster is running.
Repair options and what they typically cost
Once you know how bad the damage is, three paths open up. A small break can often be fixed at home; a bigger problem usually needs a shop.
- Conductive-paint repair kits brush a conductive compound over a broken section of line, letting it cure to restore the electrical path. They work well for one or two small breaks but are not built to rebuild a line that has been stripped across a wide area, according to Home Grail's defroster repair walkthrough.
- Professional grid repair uses the same conductive-repair approach but pairs it with pre and post-repair testing, which tends to hold up longer and comes with an actual guarantee behind the work.
- Full glass replacement becomes necessary when bus-bar tabs are compromised or damage spans multiple lines, since a torn tab usually cannot be patched reliably. Frost Fighter notes that kits like its own are not meant to restore a defroster that has been destroyed outright, and replacement glass is the fallback.
Cost varies widely by vehicle and glass type, so get a specific quote rather than assuming a number in advance.
When to call a professional and what to ask them
Handle a single small break yourself if you are comfortable with a multimeter. Once several lines are gone, a bus bar looks damaged, or you are not confident testing live circuits, bring in a professional instead.
- Do you steam the film off, or scrape it?
- Will you inspect and photograph the grid before starting?
- Do you test the defroster before and after the work?
- What warranty backs the repair or install?
Pro Tip: A shop that hesitates to answer the steam question, or has no photos of past grid repairs, is worth skipping.
Razor-only removal, no post-work testing, and refusal to show past repair examples are the clearest red flags of a shop that will cost you more than it saves.
A prevention checklist before you tint or remove tint
A few minutes of preparation prevents most of the damage described above. Before tinting, tell the installer about any prior film on the glass and ask them to inspect the grid and photograph it first. Before removal, insist on steam, ban steel razors from the job, and require a water-break test once the film is off.
- Disclose prior tint history and request photos of the grid before work begins
- Require steam-based removal with no steel blades near bus bars
- Schedule extra time for rear glass, since rushing invites scraping
- Avoid wiping or scraping across the lines during everyday cleaning
- Report any trunk impact or loose-feeling tab right away, before it becomes a full break
Why Tint & Wraps Customs handles rear glass differently
Tint & Wraps Customs specializes in window tinting, paint protection film, ceramic coating, and vehicle wraps, and has protected more than 1,000 vehicles with a 5-star customer rating, according to Tint & Wraps Customs. Every install happens inside a climate-controlled facility built to avoid the dust and rushed conditions that lead to scraped grids.
That same facility handles Tesla and other EV rear glass, where sensor placement and grid layout demand extra care. Jake writes for the Tint & Wraps Customs blog on tinting and vehicle protection, drawing on the shop's day-to-day removal and install work to explain what actually damages a defroster grid and what protects it.
What actually protects a defroster grid
The advice that gets repeated most, "just be careful," is not specific enough to prevent damage. What actually matters is sequence: steam before touch, plastic before steel, and a meter before you assume a line still works. Most guides stop at "use a steamer" and skip the diagnostic step entirely, which leaves owners with no way to tell a cosmetic gap from a dead circuit.

My own view is that the multimeter step is the most skipped and the most important. A line can look complete and still fail to conduct, and only a continuity check catches that before the film goes back on. I would also push back on the idea that DIY conductive-paint kits are a universal fix. They work for a pinhole break, not for a strip of missing conductor, and treating them as a first resort often delays the replacement decision that was needed from the start.
If you take one thing from this, prioritize the inspection and testing steps over the removal method itself. Even a careful steam job can leave a hidden break, and that only shows up if someone checks.
— Jake
How our shop handles rear window tinting and removal
Every rear window removal is steamed, the grid is documented with photos before and after, and the defroster is tested before new film goes on, all inside a climate-controlled bay. Warranties back the work to help protect customers against grid issues after installation.

At your appointment, expect a grid inspection, a clear quote, a time estimate, and a post-work defroster test before you drive off. Book your rear window tint or removal with us and skip the guesswork.
Sources
- Can You Tint a Heated Rear Window? | ProView Arizona
- Tint Removal: How Shops Strip Old Film Fast | Glacier
- Window tint and tint removal for defrosters — Frost Fighter technical bulletin
- How to Fix a Rear Window Defroster In 11 Steps (With Pictures) | Home Grail
FAQ
Does running the rear defroster ruin window tint?
No, running the defroster does not damage properly installed tint on an intact grid. The risk runs the other way: removing old tint can damage the grid itself if it is scraped rather than steamed off, according to ProView Arizona.
How do you remove window tint from a rear window without damaging the defroster?
Steam the film until it releases, then peel it parallel to the gridlines using plastic tools instead of metal blades, following the process outlined by Glacier. Finish with a water-break test and a visual check of the lines before applying new film.
How much does it cost to fix a rear window defroster?
Cost depends on whether a small conductive-paint repair will do the job or whether the glass needs full replacement, and it varies by vehicle and glass type. Get a quote from a shop or glass specialist rather than assuming a figure in advance.
Can a heated rear window be tinted?
Yes, a heated rear window can usually be tinted safely, since fresh film applied over an intact grid has little to grip other than the glass surface, per ProView Arizona. The real risk shows up later, if that tint is ever removed carelessly.